Quit the Vim
<esc> :q! <enter>Vim Forks and Neovim
Neovim is a fork of Vim and defines itself as an extension of Vim with the goal that make easy to contribute. Neovim can be used as a drop-in replacement of Vim.
Creating a file
$ vim <enter>
$ vim filename
$ vim directory/filename
Vim modes
Vim provides different modes to users for focus on content.
- normal mode: vim starts with this mode. Esc is used for enter this mode.
:h Normal-mode🐠 - insert mode: used for add text to editor, can be entered by one of insert commands
:h Insert-mode🐠 - replace mode: used for replace existing text by directly typing over it, can be entered by
R:h Replace-mode🐠 - visual mode: used for select an area on text. Character-wise selection can be made by v, line-wise selection can be made by V, and block-wise with C-v
:h Visual-mode🐠 - command mode: used for enter Ex commands, can be entered by
:and require to press enter key. Example::w <enter>:h Cmdline-mode🐠
General
$ vimtutor Official tutorial of Vim

:h user-manual
:h help-summary On usage of build-in documantation
:h subject help about the *subject*. Ex: `:h python` (C-] to click hyperlinks, C-T to back)

:q quit
:w write
:saveas filename save as
:wa write all the changes
:wa[!] force Vim write all the changes
:wq write and quit
:x update and quit
:wqa write quit all
:q! if file is changed and not supposed to saved, quit
u undo example: 4u
C-r redo (push Ctrl button then r)
U Undo all line

s=seconds, m=minute, h=hour, d=day
:earlier #m turn back # minute ago of the file Ex: :earlier 2m or :ea 3d
:later #m turn back # minute later state of the file Ex: :later 7s or :lat 9h
y yank, copy
yy yank all line
p paste to below of cursor
P Paste to above of the cursor
c change, change the selected area
. repeat latest command
:term start a terminal session inside vim, more at `:h terminal`
:!<cmd> execute <cmd> commands without leaving Vim Ex: `!g++ -wall -std=c++14 main.cpp`, `!ruby %`
:sh go to shell, return by `exit`
$C-z send vim to background, return by $fg
Moving around
:h motion🐠k
h cursor left ^
j cursor down h < > l
l cursor right v
k cursor up j
0 beginning of line
$ end of line
w jump to first character of next word
e jump to last character of the current word
b jump to first character of the current word
H jump to *top* of the screen
M jump to *middle* of the screen
L jump to *lower* of the screen
C-b jump a full screen size up
C-f jump a full screen size down
C-u jump half screen size up
C-d jump half screen size down
:h scroll-cursor🐠z<enter> redraw, cursor on the top of window, and put cursor at first non-blank in the line
zt like above but leave the cursor in the same column
z- redraw, cursor on the bottom of window, and put cursor at first non-blank in the line
zb like above but leave the cursor in the same column
z. redraw, cursor on the center of window, and put cursor at first non-blank in the line
zz like above but leave the cursor in the same column
w jump beginning of next word (punctuation considered as a word)
e jump end of the word
ge jump end of the previous word
b jump begining of the previous word
^ jump to first non space character on line
gg top of the file
G bottom of the file
+ begining of the next line
- beginning of the previous line
W jump beginning of the next word (punctuation not considered words) v v
E jump end of the next word (punctuation not considerd as words) Ex: e (abcd) E (abcd)
B jump begining of the previous word
#G go to line number # Ex: 38G
#gg same as #G
In more general:
gg
                 ?
                C-b
                 H
                 {
                 k
^ F T ( b ge h       l w e ) t f $
                 j
                 }
                 L
                C-f
                 /
                 G
Entering insert mode
/~~~~~~~~~~~~\
                           |command mode|
                           \~~~~~~~~~~~~/
                           |           |
                           ^ :/        v Esc Esc
                           |           |
 /~~~~~~~~~~~~\----Esc---->/~~~~~~~~~~~\<---Esc------/~~~~~~~~~~~\
 |replace mode|            |normal mode|             |insert mode|
 \~~~~~~~~~~~~/<----R------\~~~~~~~~~~~/--aAiIoOsS-->\~~~~~~~~~~~/
                           |           |
                           v vV        ^ Esc
                           |           |
                           /~~~~~~~~~~~\
                           |visual mode|
                           \~~~~~~~~~~~/
i insert text before cursor
I insert text to start of the line
a append after cursor
A append text to end of line
o make newline below to current line and insert text
O make newline above to current line and insert text
s delete character under cursor and enter insert mode
S delete all line and enter insert mode
cc same as above
cw change from cursor position to start of the next word

S-r enters [replace mode](#replace-mode), change text in place
Working more than one file
:h usr_08.txt🐠C-ws split current window horizontally (alternative :split)
C-wv split current window vertically (alternative :vsplit)
C-ww jump to next window
C-w h jump from current window to window on the left
C-w j jump from current window to window on below
C-w k jump from current window to window on above
C-w l jump from current window to window on left
C-w t jump to top most left window
C-w b jump to bottom most right window
C-wq close current window
:close same as above
:only close windows other than current
C-w#< resize current window to the left # of times (default 1)
C-w#> resize current window to the right # of times (default 1)
:res # resize horizontally splitted window # of times
:h window-moving🐠C-wH move current window to the far left
C-wJ move current window to the very bottom
C-wK move current window to the very top
C-wL move current window to the far right
$vim --help for list Vim paramaters `h vim-arguments`:tropical_fish:

$ vim -O2 f1.txt f2.txt open Vim with `-O[N]` paramater, vertically splitted f1.txt and f.txt
$ vim -o2 f1.txt f2.txt like above but horizontally splitted
$ vim -P2 f1.txt f2.txt like above but on tab pages

$ vim f1.txt f2.txt open the files but show only one at a time (navigate with :next and :prev)
using tab pages
:h tabpage🐠:tabedit filename edit specified file in a new tab
:tabfind filename open a new tab with filename given, searching the 'path' to find it
:tabn next tab
:tabp previous tab
:tabfirst first tab
:tablast last tab
:tabm {i} move current tab to i+1 place
:tabclose i close tab i
:tabclose close current tab
:tabonly close other tabs but current
:tabs list tabs
Repeating commands without repeating yourself
operator [number] move or [number] operator move
c3w or 3cw, cw cw cw
4j jjjj
2w w w, go to the begining of 2 next words
2dd delete 2 lines
repating more than one command by recording
:h recording🐠Recording more than 1 move would be greatly useful. Vim has 26 register(a-z), which can be considered 26 different clipboard!!!
- start recording with
qand choose a register to record on. Ex: qa - exit from recording with Esc.
- apply what you record with
@<reg>Ex: @a
q[a-z] start recording
@[a-z] apply record
Editing
x delete the character under the cursor
X delete the character before the cursor
dw delete word from cursor position to start of the next word(punctuation considered as a word)
dW delete Word from cursor position to start of the next word
d^ delete from first non-whitespace character to end of line (inclusively)
d$ delete till end of the line
D same as above
dd delete all line
dib delete content inside the paranthesis
r<c> change the character under the cursor to <c>
* find next word under cursor
f<c> find character <c> from current cursor position inside the line
'. jump to last edited line
g; jump back to last editted position
:ab sth something in insert mode, when written 'sth'<space> change it with 'something'
:g/^#/d delete all the lines start with #
:g/^$/d delete all the empty lines
find and change
:h substitute🐠:s/old/new change first 'old' with 'new' on the current line
:s/old/new/g change all 'old' with 'new' on the current line
:s/old/new/gc change all 'old' with 'new' on the current line but before ask for permission
:#,#s/old/new/g change all 'old' with 'new' between the lines # and #
:%s/old/new/g change all 'old' with 'new' on the current file
:%s/old/new/gc change all 'old' with 'new' on the current file but before ask for permission
Some frequently used commands
yyp copy line and paste to below
yyP copy line and paste to above
ddp swap current line with the below
ea add end of the word
xp exchange two chacter Ex: sometihng -> something
dgg delete from current line to beginning of the file
Configure
dotfiles and .vimrc
:h vimrc-intro🐠:options🐠On Unix-like operating systems, most of system tools are C programs and some of these programs take arguments written in a file. Dotfiles, files with starts with a ‘.’, gives these paramaters and define program behaviour on runtime. You can read interesting story of born this trend from here. Dotfiles are specially useful when you set up a new machine, it make you avoid to configure all the things from beginning. Keeping dotfiles in a version control system is a good practice, most of users share their dotfiles in public repos.
.bashrc, .profile, .vimrc are examples of dotfiles..vimrc file defines setting of Vim at runtime. There are a system .vimrc and user .vimrc in home directory of every user. The one on home directory override system .vimrc. If you don’t have .vimrc file on your home directory, you can download from here.
mapping
:h mapping🐠 we can create shortcuts using mapping.General formula:
map shortcut longCommands
we need to add mappings to .vimrc make them permanent.
there are 3 basic mappings for three modes:
- to work in normal mode nmap
- to work in insert mode imap
- to work in visual mode xmap
nmap m <C-d> "in normal mode: when typed m, ctrl-d (half page below) will be executed
imap jk <ESC> "in inesert mode, when typed jk, pass to normal modee
Some special characters:
:h key-notation🐠RendeRenderCollectionViewrCode NYI
To check whether your mapping conflict other mappings:
:verbose map shortcutSometimes mappings conflict other mappings, so that defining your mappings as no-recursive is a good practice.
The example below demostrates such a case, the o goes one line below and enter insert mode. The expected 4 lines below and enter insert mode behaviour, end up with endless loop. The o will call 4o and it will call another 4o etc.
nmap o 4oTo make no-recursing mapping we add nore
- for normal mode nnoremap
- for insert mode inoremap
- for visual mode xnoremap
The mapping below does what we expect, from normal mode, goes 4 lines below and enter insert mode:
nnoremap o 4owe can specify mappings to filetypes:
autocmd FileType cpp nnoremap <f5> :w <bar> !clang++ -stdlib=libc++ -fsyntax-only -std=c++1z % <cr>
autocmd FileType d nnoremap <f8> :call DTest()<cr>
autocmd FileType text nnoremap <C-s> :w <cr>
leader variable
:h leader🐠You can choose a variable as a leader and use it as a mapping prefix.
let mapleader = "-" now I chose - character as a leader. After nnoremap <leader>ve :vsplit $MYVIMRC<cr> mapping, when I want to edit the .vimrc, in normal mod, can press -ve characters.See all the mappings with
:mapAdding plugin
The easiest way to adding plugin to Vim is make use of a plugin manager. There are several of them:
adding plugin with vim-plug
vim-plug is a plugin manager for Vim which allows you to add, update, remove plugins.
run the follong command:
$ curl -fLo ~/.vim/autoload/plug.vim --create-dirs \
 https://raw.githubusercontent.com/junegunn/vim-plug/master/plug.vim
and than add your .vimrc to this:
call plug#begin()
" plugins
call plug#end()
Add the plugin you want to install between
call plug#begin() and call plug#end() commands. Most of vim plugins host and maintain on Github.For example, to add plugin on the link https://github.com/tpope/vim-sensible, you should put:
call plug#begin()
Plug 'https://github.com/tpope/vim-sensible'
call plug#end()
or
call plug#begin()
Plug 'tpope/vim-sensible'
call plug#end()
and then invoke
:PlugInstallcommand, that’s it! After add the plugin, the usual step is reading its documentation to learn and make some more configuration.
Creating your own plugin
:h write-plugin🐠:h plugin🐠You can write your own plugin! A Vim plugin is a program written in vimscript (VimL) language. Generally consist of following parts.
MyAwesomePlugin/
.
├── autoload Autoloaded functions according to filetype
├── doc Documantation file
├── ftdetect File type detection
├── ftplugin Plugin for a particular file type
├── plugin Plugin file
├── syntax Syntax highlighting
└── after
└── indent
└── compiler
Hello World plugin
Add the folder contain the plugin to
runtimepath: set runtimepath+=/path/to/helloworldhelloworld/
.
├── autoload
│ └── greet.vim
├── plugin
└── greet.vim
" plugin/greet.vim
if exists('g:loaded_greet')
 finish
endif
let g:loaded_greet = 1

command! Greet call greet#hello_world()
" autoload/greet.vim
function! greet#hello_world() abort
 echo "Hello World!!"
endfunction
That’s all😃 Try with
:Greet on command mode.Vim for programmers
Vim is a great tool for programmers. There are several plugins for autocompletion, refactoring, linting, code-formating and lots of others. Writing such plugins are non-trivial job, porting them to other editors is almost impossible. People come up different approaches so far, some of them are pretty successful.
In 2016 Microsoft developed Language Server Protocol to stop reinventing the wheel, and regulating such operations. Unless you have a good reason to not using it, LSP is the way to go for make Vim to gain IDE like features. To use it, you need to install language server implementation for the language you programming in and add language client plugin to Vim.
I use clangd language server, and coc.nvim as a client for programming C++. See the list of language servers and clients lists from here.
An incomplete list of plugins
For newcomers
Code completion and language client
- coc.nvim
- LanguageCliient-neovim
- vim-lsc
- YouCompleteMe
- deoplete.vim
- Neocomplete
- ncm2
- VimCompletesMe
- completor.vim
- vim-mucomplete
List of language servers
Lint and syntax check
Snippet
Programming language
GUI-like
Theme and colors
Plugings for better user experience
- Surround
- Fugitive
- vim-commentary
- ctrlp
- vim-ctrlspace
- vim-capslock
- vim-repeat
- NrrwRgn
- vim-obsession
- vim-gutentags
- lite-dfm
- goyo.vim focus on content
- limelight.vim partially highlight
Links
sites
- Vim.org
- Vim Repo
- gvim appimages
- neovim.io
- neovim nightly builds
- vimawesome.com Vim plugins
- dotfiles.github.io
- yet another dotfile manager
books
- Practical Vim: Edit Text at the Speed of Though by Drew Neil1
- Modern Vim by Drew Neil
- Learning Vi and Vim Editors by Arnold Robbins, Elbert Hannah
- The VimL Primer: Edit Like a Pro with Vim Plugins and Scripts by Benjamin Klein
- Mastering Vim: Build a software development environment with Vim and Neovim by Ruslan Osipov2
- A Byte of Vim (Online Book)
cheatsheets
- http://www.worldtimzone.com/res/vi.html
- http://www.fprintf.net/vimCheatSheet.html
- https://wiki.archlinux.org/index.php/Vim
- http://www.fprintf.net/vimCheatSheet.html
- https://devhints.io/vimscript
Building Vim from source code
If you’re using an Unix based operating system, Vi or Vim is probably preinstalled but Vim needs to some features that not enabled by default. To enable them you might need to build Vim from its source code.
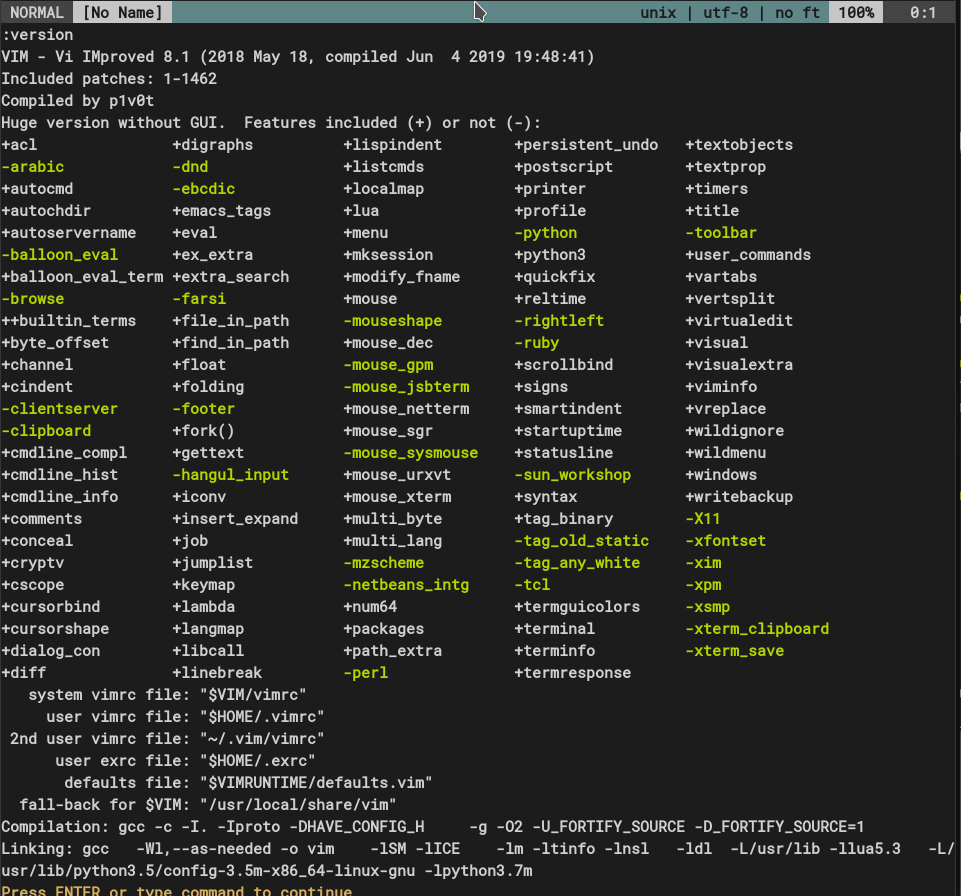
Which features enabled by default is changing distro to distro, check out with:
:versionDownload repo with Git:
$ git clone --depth=1 https://github.com/vim/vim.git && cd vimbefore start building, we need to do configure, this is the phrase you’ll choose which features to enable.
$ ./configure --helpThese are the paramaters I use:
$ sudo ./configure --enable-fail-if-missing \
--disable-darwin \
--disable-smack \
--disable-selinux \
--enable-luainterp=yes \
--with-python3-command=python3interp \
--enable-python3interp=yes \
--with-python3-config-dir=/usr/lib/python3.5/config-3.5m-x86_64-linux-gnu \
--enable-cscope \
--disable-netbeans \
--enable-terminal \
--enable-autoservername \
--enable-multibyte \
--disable-rightleft \
--disable-arabic \
--disable-farsi \
--enable-fontset \
--enable-gui=no \
--enable-gtk2-check=no \
--enable-gtk3-check=no \
--enable-athena-check=no \
--enable-nextaw-check=no \
--enable-carbon-check=no \
--disable-gtktest \
--with-compiledby=p1v0t
yours might be different according to your need and be ready to search and install third-party libraries. After this step, the files build system need are generated, with GNU make build tool:
$ sudo make -j 8The ‘-j’ parameter says how many cores we dedicate to the build process. Generally the more cores used, the faster the build process, therefore the less time the build will take. At the end of this process, executables will be created. To make them available as system command, we need to copy them to appropriate directories (you need superuser permissions):
$ sudo make installDon’t delete the repo yet, in order to apply patches or experiment with the latest features by
git pulling them. The subsequent build will be a lot faster, because make compiles only changed files.Based on https://github.com/p1v0t/Doctor